Category Archives: Rachel’s Recipes

Indian Sweet Potato Soup

Sometimes I feel paleo food blogs rely too much on sweet potatoes – but really, they are such an ancient and ubiquitous crop, and they are a s0-called superfood, and they’re pretty delicious,  so I’m guessing we’ll continue to see lots of ideas for preparing sweet potatoes.

This one I stole (ahem, adapted) from Vindalho, a Portland Indian restaurant after a friend’s birthday celebration.

Easy Indian sweet potato soup:

Three medium sweet potatoes, boiled, peeled and quartered (hint, peel them after they are cooked)

Two cloves of garlic, minced

1/2 sweet onion, chopped and softly sauteed in butter or coconut oil

Salt and Pepper to taste

A dash of garam masala

One cup coconut milk

Put all of the above (cooked) ingredients into the blender in batches, and blend until smooth.  Heat and serve with a bit of fresh cilantro.

Easy, pretty, yummy!

Sweet potato soup


Carrot Pineapple Salad from Purely Primal

Purely Primal is one of the food blogs I read regularly.  It is extra good because it is co-hosted by Coach Karen from Crossfit Fort Vancouver, and  also because it has an excellent layout, is very searchable, and has a handy shopping list and printable recipes.

So, when I saw this post, I immediately decided to make this recipe.  I had forgotten that Ellen had posted a carrot salad recipe already on this site!  But I still decided to post this recipe review, because this carrot salad was really, really yummy.  I made it for company and had to give the recipe out on the spot.

This recipe makes a lot of salad, but the leftovers were great.  Here is the recipe from Purely Primal.  Enjoy!

  • 1 lb carrots, shredded
  • 1 can (20 oz) crushed pineapple, strained (separated)
  • 1/2 cup homemade mayo
  • 1-1/2 cups raisins
  • 1-1/2 cups chopped nuts
  • 1-1/2 cups shredded, unsweetened coconut

Peel and shred the carrots (a food processor with shredding disk is very helpful for this) and place in a large mixing bowl.  Chop the nuts and toss them in as well. Add in the raisins, mayo, pineapple, and coconut.  Stir everything very well to fully combine and coat, then add in pineapple juice a little at a time to adjust the sweetness and the creaminess of the dressing.  You can store this sealed in the fridge up to about a week.

Notes:  I used hazelnuts and almonds for the nuts, shredded the carrots in the food processor, and used the mayo recipe from The Clothes Make the Girl.  I served it with the garlic lime chicken which Susan posted a few weeks ago.

Carrot Salad Carrot Salad 2


Paleo Macaroon Fail (sort of)

Disclaimer:  this isn’t really a “fail” – and I really like Civilized Caveman‘s website.  His ideas are so creative (rosemary fried lemon!), and his photos are really beautiful.  That’s all success!  But the recipes on the site include a lot of paleo treats, which tempt me but rarely work out the way I wish they would (with the exception of Blackberry Nut Clusters, which are the bomb.)

So, I didn’t have super-high expectations for these Raw Chocolate Pumpkin Pecan Macaroons.

coco pumpkin balls

I wanted to make a treat for a potluck, mostly so *I* wouldn’t eat a ton of the other treats I knew would be there.  This strategy worked – I successfully avoided the pie and brownies and ice cream – but the rest of the guests wouldn’t touch these.  And I understand that.  Whether or not I’m low-carbing it, the “healthy” sweet treats don’t usually cut it for me.  Let me eat cake!  Or just no treats at all.

The verdict?  These were easy to make and much better for you than traditional treats.  But not so appealing to me, personally.


Eggs in a Nest

A couple of weeks ago I was privileged to see Leonard Cohen in concert, preceded by tapas at Portland’s Toro Bravo (A primal restaurant if ever there was one!  And good luck getting seated.)  One of the small plates I shared with friends was sauteed chard with garlic topped with an egg.  It was so simple and delicious, and I figured I could make this at home.

So, I checked the internet for a suitable recipe, and I’ve been experimenting.  I have tried adding red onion and pattypan squash.  Here are a couple of links which gave me the bare bones, and here’s the recipe I’m most satisfied with:

Ingredients

One bunch of swiss chard (preferably organic, because greens are likely to have pesticide residue)

1/2 red onion

2-3 cloves of garlic

Salt and pepper to taste

2 eggs

Olive oil

Directions

Medium chop red onion.  Saute in olive oil on low to medium heat.  After a few minutes, finely mince the garlic and add to the onions.  The garlic is absolutely key to this recipe.  Wash and chop the chard, discarding the stems.  Add the chard at the last minute.  Add salt and pepper to taste.

Once the veggies are done, divide and transfer to buttered ramekins.  Crack an egg over each ramekin.  Bake at 350 for 6 to 8  minutes, until the egg is soft set.  Do not overcook the egg.

The result – crazy good!  You MUST try this.  It is definitely better suited to a weekend morning or dinner, due to the extra chop time.  And it wouldn’t make good leftovers, but that shouldn’t be a concern.

Chard   Eggs in a nest


Brussels Sprouts in Cherry Sauce from Purely Primal

You know, people freaking HATE Brussels Sprouts.  Really, really hate them.

Except me.  I like them all ways, and I like them all the more because I can only get them in the autumn.

So if you, like me, actually enjoy Brussels Sprouts, fly your freak-flag high, and make this dish from Purely Primal.

Here’s the recipe as written from the website:

Ingredients
  • 1-1/2 lbs fresh Brussels sprouts, ends trimmed and cut into halves
  • 1 cup dried sour cherries, divided
  • ¼ cup butter, softened
Instructions
  1. Preheat the oven to 400 degrees.
  2. Place ½ cup cherries into a small food processor or blender with the butter.
  3. Process until to form a smooth paste.
  4. Toss the trimmed and halved Brussels sprouts into a medium mixing bowl with the remaining cherries.
  5. Spoon half of the butter mixture into the bowl and turn everything to evenly coat the cherries and sprouts with the mixture.
  6. Transfer to a sheet or bar pan in a single layer and place in the oven. Set a timer for 15 minutes. Check after 15 minutes, and cook longer if not browned and starting to crisp.
  7. Meanwhile, roll the remaining butter mixture up inside of a piece of wax paper to about the diameter of a nickel and place it into the freezer for 15 to 20 minutes. When chilled and firm, remove and slice into ⅛” thick pats.
  8. Once the Brussels sprouts have roasted for about 20 minutes (they should be starting to brown heavily on the exposed sides, and some will be getting rather crispy), pull them out and transfer everything to a serving bowl.
  9. Serve warm, with a pat or two of the cherry butter on top.

Their website (which is awesome – check out this cool shopping list!) has better instructions, with photos.

Naturally, I didn’t follow the recipe.  I didn’t have any dried sour cherries, but I did have dried bing cherries, so I used those.  Also, I thought some roasted hazelnuts would be good in this – and I was right!  It made a gorgeous side dish, and I had leftovers (because people freaking HATE Brussels Sprouts), but these froze well.  Here it is mid-prep, and just before serving:

brussel sprouts    brussels2


Butternut Squash Souffle from PaleOMG

PaleOMG is my favorite website, of this week, anyway.  She is really on with the Thanksgiving ideas.

This recipe came out really well, considering that I didn’t follow the recipe.  I intended to – I tried to – but I never get recipes exactly right.

Most of the time, I don’t care.  Ball park is good enough for most paleo cooking.  But the idea of souffle intimidated me, given my track record with traditional souffles.

But, no worries, it came out great!  This was a trial run for Thanksgiving, and this is definitely going onto the menu!

PaleOMG Thanksgiving Savory Butternut Squash Souffle

Ingredients
  • 1 small butternut squash, cut in half lengthwise (about 2 cups pureed)
  • 4 eggs, yolks and whites separated
  • 1 heaping tablespoon coconut flour
  • 4 slices of bacon, diced
  • ~1/4 cup rendered bacon fat (from the bacon you just cooked)
  • 1 garlic clove, minced
  • 1 shallot, sliced
  • 1 teaspoon fresh thyme, chopped
  • 1 teaspoon fresh sage, chopped
  • salt and pepper, to taste
Instructions
  1. Preheat oven to 400 degrees.
  2. Place butternut squash* cut side down on a baking sheet.
  3. Bake for 30-35 minutes until soft. Then scoop out the excess seeds (I scoop out the seeds after it bakes. It’s way easier that way). Then turn down oven to 350 degrees.
  4. Scoop out the insides of your butternut squash and place in the food processor.
  5. Puree until smooth.
  6. Now place your diced bacon in a pan over medium heat and cook until crispy. Remove cooked bacon with a slotted spoon and place on a plate with a paper towel.
  7. Now pour out the excess bacon fat into your food processor, leaving behind a tablespoon in the pan.
  8. With your butternut squash and bacon fat in the food processor, add your egg yolks as well. Puree until smooth, then add to a large bowl.
  9. In the pan with the leftover bacon fat over medium heat, add your minced garlic and sliced shallots.
  10. Cook until shallots are tender and translucent.
  11. Add shallots, bacon, coconut flour**, herbs, salt and pepper to your bowl and mix well.
  12. Now in a separate large bowl, beat egg whites until stiff peaks form***. With a spatula, fold in egg whites into your squash bowl until no white streaks remain.
  13. Grease your ramekins with coconut oil and pour in mixture to each ramekin. My mixture made 5 soufflés.
  14. Bake for 35-40 minutes.
  15. Serve and love life.

*  I failed to roast my squash.  I cooked it in a water bath, which is my usual way.  I was afraid it would be too moist and ruin the recipe, and I will roast it next time.

**  I hate coconut flour, but I did try to buy some so I could follow this recipe.  But the store didn’t have it, so I subbed almond flour.

***  I did get a nice upper body workout trying to make peaks form on my eggs, but it never quite got there.  I do have a KitchenAid, but in the world’s smallest kitchen, it is an undertaking to pull it out.  I’ll get it out for the actual Thanksgiving prep.

Here’s how mine turned  out:


Pumpkin Cream Chicken Casserole from PaleOMG

Dear Internet:

I broke my camera.  So now I can only take photos with my stupid Blackberry.  One day, I will buy a new camera.  But until then, I’m stuck with even-worse-than-usual photos.

So, for this post, the photos are bad, but the food was good.  In celebration of autumn, and already enjoying pumpkin chili and pumpkin spiced coffee, I tried Pumpkin Cream Chicken Casserole from PaleOMG.  She actually did a post with 19 pumpkin recipes – you should check it out!

Here is the Pumpkin Cream Chicken Casserole recipe, directly from PaleOMG:

Ingredients
  • 1-1.5 lbs chicken breasts, chopped into 1 inch cubes
  • 1 medium sized spaghetti squash (I don’t weigh that sh*t), cooked and shredded
  • 1 head cauliflower, chopped
  • 1 can pumpkin puree
  • ½ can canned coconut milk
  • 3 garlic cloves, minced
  • ½ yellow onion, diced
  • 2 tablespoons olive oil
  • 1 teaspoon garlic powder
  • 1 teaspoon onion powder
  • ½ teaspoon cinnamon
  • ¼ teaspoon nutmeg
  • salt and pepper, to taste
Instructions
  1. Preheat your oven to 425 degrees.
  2. Time to roast our veggggggies! Chop your cauliflower and put it in a baking dish topped with a little bit of olive oil and salt and pepper. Then cut your spaghetti squash in half, use a spoon to scoop out the seeds and extra threads, place face down on a baking pan. Add the cauliflower and spaghetti squash to the oven, side by side if possible, to roast for around 25 minutes. (Depending how big your spaghetti squash is, the cauliflower made roast a little quicker, but mine cooked at the same time) You will know your spaghetti squash is cooked when you can poke the outside skin and it gives a bit.
  3. While the squash and cauliflower are cooking, it’s time to cook up your chicken. Pull out either a LARGE saucepan or a large pot and put under medium-high heat.
  4. Add olive oil to it along with your minced garlic. Once the garlic begins to smell, add your chopped onions and cook until translucent.
  5. Add your chopped chicken to the cooking onions, cover and let steam for around 5 minutes.
  6. Once the chicken is about ⅔ cooked through, add your can of pumpkin, half can of coconut milk, and spices directly to the pan. Mix thoroughly. Taste to see if you need any more spices or salt.
  7. Once your squash and cauliflower is done cooking, and chicken saucey mixture is heated up, de-thread spaghetti squash with a fork, running the fork the opposite way of the threads.
  8. Add your spaghetti squash threads, roasted cauliflower, and chicken saucey mixture to a 9×11 glass baking dish and add dish to the oven under the broiler. Cook for about 5 minutes, getting a little dark on the top.
  9. Remove from oven and let sit for around 10 minutes to help the sauce thicken up. Then eat the crap of that deliciousness.

OK, Rachel’s back now.

What I liked:   Although I love roasted cauliflower, spaghetti squash, and pumpkin, I never would have thought to try to combine them.  But the texture was very nice and toothy.  This dish freezes well, and it is one of those recipes that tastes better the next day.  Plus, it is an easy, straightforward recipe.

What I’d do differently next time:  Mine came out warm and satisfying, but not very spicy.  I’d add more onion and garlic next time.  (The recipe calls for added garlic and onion powder, but I didn’t have these.)

Here is how it looked out of the oven (excuse the messy kitchen – I had just made red curry) and when I ate a bowl immediately because it looked too good to wait:


Stuffed Eggplant (Part Two of my Dracula Dinner)

More Halloween goodness!

If you believe Halloween is all about peanut butter taffy and weird chocolate candy which I *swear* is not the same as the regular recipe (damn you, fun size Snickers!) – well, take heart (lol!). Because there is so much more Halloween food to be had.

Back to the “Food of Dracula.”

I loved Paprika Hendl, and that was a simple if not easy dish, but I was more challenged by the description of “Egg-Plant Impletata.” Google was of little help. It turns out that “impletata” just means “stuffed” in Romanian (well, according to the internet, anyway – any Romanian readers care to correct me?).

So, there are approximately *no* Romanian eggplant recipes out there, but there are lots of Turkish and Italian stuffed eggplant recipes. Dracula describes the eggplant thusly:

“Egg-Plant stuffed with forcemeat, a very excellent dish, which they call ‘impletata.'”

I weeded through several recipes and kind of decided “forcemeat” meant “sausage.” I hobbled together some recipes, and this is what I prepared:

Impletata

Ingredients
2 Medium Eggplants
1 pound of Italian Sausage
4 garlic cloves, minced
Some basil
1 cup of chopped tomatoes
Salt and pepper
Olive oil

First, I sliced the eggplant, scooped out the middle, then salted the pieces and the shells for 30 minutes.

Second, I rinsed the eggplant, mixed it with the sausage, garlic, basil, tomatoes, and salt and pepper, then stuffed the shells and baked them in a pan greased with olive oil at about 350 for about 30 minutes.

Here’s what they looked like when they came out of the oven:

It was FABULOUS – but I don’t know how it would freeze, as we had no leftovers.

We also enjoyed the plum brandy of Hungary – suggested by Count Dracula himself!


Paprika Hendl

Happy late Halloween!

I re-read Dracula this autumn (after 17 years!), and I was surprised to see how much food is featured in this classic novel.   Jonathan Harker travels east into Hungary and then Romania, and he is fed by innkeepers and later by Count Dracula himself.  The descriptions of food were so striking that I formed the idea to try to cook the food from Dracula.  What a creative idea, right?
Turns out I was not the first person to think of this – just Google “recipes from Dracula” and you will see what I mean!

But anyhow . . . I and some friends did make several dishes from Dracula with great success.  My favorite was Paprika Hendl, aka Chicken Paprikash.

I make paprikash all the time – and I mean all the time.  I make ground turkey meatballs and saute them with bell peppers, onion, and garlic, and throw in a little paprika and coconut oil.  Perfectly yummy.  But I’ve never actually followed a recipe for paprikash until now, and the difference was amazing!

I just took the first google hit on “chicken paprikash” and cooked it up, but I did add a bit more Hungarian paprika than called for.  I am a paprika affectionato since The Moosewood Cookbook taught me to make Hungarian Mushroom Soup back in the ’90s.  Yum!   You must invest in a good smoked paprika.   Here’s my suggestion:

Basic grocery-store standard paprika will not do for paprikash!

Then, I just followed this basic, buttery, recipe:

Ingredients

2 to 2 1/2 pounds of chicken pieces, preferably thighs and legs
Salt
2-3 Tbsp unsalted butter
2 pounds yellow onions, (about 2-3 large onions)
Black pepper to taste
2 Tbsp sweet paprika, preferably Hungarian
1 teaspoon (or to taste), hot paprika or cayenne
1 cup chicken broth
1/2 cup sour cream

Salt the chicken pieces well and let them sit at room temperature while you cut the onions. Slice the onions lengthwise (top to root).

Heat a large sauté pan over medium-high heat and melt the butter. When the butter is hot, pat the chicken pieces dry with paper towels and place them skin-side down in the pan. Let the chicken pieces cook 4-5 minutes on one side, until well browned, then turn them over and let them cook 2-3 minutes on the other side. (Take care when turning so as not to tear the skin if any is sticking to the pan.) Remove the chicken from the pan to a bowl, set aside.

Add the sliced onions to the sauté pan and cook them, stirring occasionally, scraping up the browned bits from the chicken, until lightly browned, about 7 minutes.

Add the paprika and some black pepper to the onions and stir to combine. Add the chicken broth, again scraping up the browned bits from the bottom of the pan, and then nestle the chicken pieces into the pan, on top of the onions. Cover and cook on a low simmer for 20-25 minutes (depending on the size of your chicken pieces). When the chicken is cooked through (at least 165° if you use a thermometer, or if the juices run clear, not pink when the thickest part of the thigh is pierced with a knife) remove the pan from the heat. (If you want, you can also keep cooking the chicken until it begins to fall off the bone, which may take another 30 minutes or so.)

When the chicken is done to your taste, remove the chicken from the pan. Allow the pan to cool for a minute and then slowly stir in the sour cream and add salt to taste. If the sour cream cools the sauce too much, turn the heat back on just enough to warm it through. Add the chicken back to the pan and coat with the sauce.

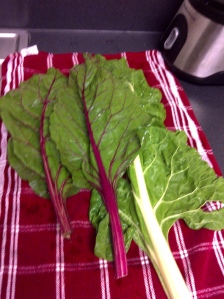
I used chicken breast, and I added spinach, because everything is better with spinach.

The bad news – this made my teeny apartment smell like onions.  I woke up the next day smelling like onions.  I probably still smell like onions.

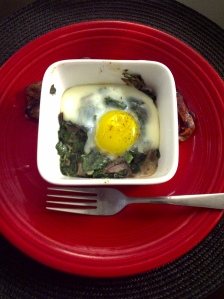
The good news – it was fabulous!   I actually have made this twice in a week.  Here it is cooking and plated up:


Zucchini “Comfort” Noodles

Hi!

I haven’t posted for a long time, and in case anyone’s reading this, I apologize.

In some ways, I have been distracted by the sad goings-on in Libya and other spots, but in other ways, I have been doing really well.

I wanted to do this blog to learn new recipes, but the last few weeks I’ve been happy to rely on old (new) standards – Alton Brown’s Pot Roast, Melissa Joulwan’s “You’re the Tops” Tuna Salad, PaleOMG Carrot Cake Pancakes, and some old standbys which I haven’t posted:  Cheeseburger Salad and Turkey Paprikash.

Still, I did recently try a new recipe.  I got a gift of lots of zucchini (and for you whose gardens are still producing, keep me in mind!), so I made zucchini noodles.  And these were *wonderful*.  I made them twice in a week.

Comfort Noodles

This recipe is not quick, but it is easy.  From the website:

Ingredients:
2 small zucchini, julienned (about 2 cups) [Julienne peeler is essential.]
generous 1/4 teaspoon salt
1 tablespoon almond flour or almond meal
1/2 teaspoon coconut oil
1 tablespoon extra-virgin olive oil
1 clove garlic, crushed
3 eggs, scrambled
a handful of fresh parsley, minced for garnish (optional)
salt & pepper, to taste

Directions:

1. Place the julienned zucchini in a colander or wire strainer and toss with the salt until coated. Allow to sit for 20 minutes to drain excess water, then rinse and pat dry with paper towels. (You may be tempted to skip this step; I strongly advise against it. This step insures tender, rather than watery, noodles.)

2. While the zucchini is sweating in the colander, heat a large skillet over medium-high heat. Mix the almond flour with the coconut oil, sprinkle it with a smidgen of salt, then sauté in the pan, stirring often with a wooden spoon, until it’s toasty brown, about 1 minute. Remove from pan and save for garnish.

3. Return the pan to the heat and add the zucchini noodles. Sauté until just tender, about 1-2 minutes. Push the noodles to the side of the pan, and reduce heat to medium-low. Wait a minute; it’s essential that the pan cools down before adding the eggs. Add the olive oil and garlic. When the garlic is fragrant, about 20 seconds, pour in the eggs and allow them to cook until just beginning to set a tiny bit. Mix the zucchini noodles into the egg and continue to stir gently and continuously until the egg is set and clinging to the noodles. Taste, then add salt and pepper to your liking.

4. Serve noodles in a deep bowl and sprinkle with the almond flour crumbs and minced parsley. Slurping and ridiculously big bites heartily encouraged.

Here are my results!