Category Archives: Veggies / Sides

Broiled Zucchini

Happy Weekend!  Here is an easy and versatile side-dish to get you started:

Broiled Zucchini from Nom Nom Paleo

It uses minimal ingredients and is perfect now, when zucchini is coming into season.

This smells *wonderful* while it is broiling. (Like cookies!  Well, sort of.)  It cooks super-fast and is very tasty.  I used coconut oil and salt and pepper.  You do need a mandolin slicer to make this.  I cut the *tar* out of myself with my mandolin slicer at least once a year, so heed my advice – do not ever take your eyes off the mandolin slicer!

So be careful, but try these this weekend.


Cauliflower Rice

I had wanted to try this for sometime.  I had needed a base for several of my dishes and I missed being able to use rice.  I don’t miss all the mineral sucking phytate that is in brown rice, but I do miss the cozy bed that it used to make to tuck my tender main dishes into.  So, I had heard about this cauliflower “rice” mentioned frequently on Mark Sisson’s site (http://www.marksdailyapple.com/#axzz1suYnluSM) and have wanted to try it.  The original recipe hails from his Primal Blueprint Cookbook.   I served a tasty little pan-fried cod with sautéed red peppers over it and this rice held up really well.  It absorbed some of the pan drippin’s from the fish and was pretty darn convincing as “rice” goes.  The down side to this recipe is that it takes some work.  I ended up using a hand grater instead of a food processor to grate the cauliflower.  I didn’t think the processor was doing much more than pulverizing the cauliflower and making more of a mess than just doing it by hand.  So, it took a little while to get the job done, but I ended up with a more attractive “rice” than just a pile of mush.

Ingredients: 

1 head of cauliflower, grated for 1 or 2 cups (however much you will need)

Lots of Oil (i.e. organic butter, olive oil, or coconut oil depending upon your preference.

Lots of salt and pepper to taste.

Steam the riced cauliflower for just a few minutes until tender.  (I grated it directly into a glass bowl, covered it with a soaking wet paper towel, and microwaved it for 2-3 minutes.  Add lots of oil, salt, and pepper to taste.  I found it took lots as it is pretty bland just by itself.  Of course, these amount may vary depending upon what you plan to serve over it.

In the picture above, I served cod that had been gently pan-fried in olive oil and garlic, seasoned with salt and pepper.  The helpful chef that owns the natural food store close to us suggested just to fry it in a little butter so as to not overwhelm the subtle sweet taste of the meat.  But I love garlic (as I’ve mentioned before!) and prefer the strong overwhelming garlic taste on the cod!  It turned out great and I am looking forward to experimenting with this rice again.


Scary Rosemary Squash

OK, I have a confession to make.   I have a fear of butternut squash.  Not of eating it, no.  I am scared of cutting it.

The skin is so thick, and the shape is so awkward, plus the squash is so big, I’m afraid of really cutting myself with my big chef’s knife while I try to cut up the squash.  So I’ve resorted to other options.

Option 1 (credit my friend Maggie):  Put your whole squash into a grocery bag, tie or staple it shut, then go out to your concrete patio and slam the bagged squash into the concrete.  The squash will break apart into pieces, which you then can clean out and bake in a water bath.  No cutting whatsoever.

Option 2:  Go ahead and use your chef knife to make four slow steady cuts vertically and horizontally through the squash, then clean and bake in water bath.  Minimal cutting.

When I have seen recipes involving cubed squash, or butternut squash fries, my response has always been “dream on.”  I keep my fingers safe.

But it would be nice to be able to enjoy butternut squash other in some other ways, so finally, I screwed up my courage and made this:

Rosemary Thyme Butternut Squash by Purely Primal

But first I googled “how to cut up a butternut squash” and reviewed this.  That helped.

Then I got to it.  The prep was surprisingly easy.  And of course it was delicious.

So it seems I have overcome my fear of squash!


Bacon-Basil Twice Baked Sweet Potatoes

Hello from Susan again!  I have another great recipe today.  I’ve been pretty lucky with the trial recipes so far – maybe the next one will be a stinker, but this one is fabulous!

 Image

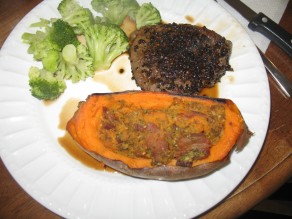
What I liked:  So tasty!  Great in the freezer too.  Sometimes having a fancy side dish makes just plain old meat loaf feel like a really good meal!

What I did not like:  You do have to have fresh basil – this is not usually a problem in the summertime around here, but I just cringe every time I have to buy one of those little boxes of ‘fresh’ herbs for two bucks a pop.  I know I’m not getting a full cup worth of leaves…  Come on summer!

I got this recipe from what is fast becoming one of my favorite sites – http://www.paleomg.com  Check out the original recipe and more:

http://paleomg.com/bacon-basil-baked-sweet-potatoes/

Ingredients


 Image

–         3 Medium Sweet Potatoes – go for the more round and plump ones

–         5-6 strips of bacon, diced (I just sautéed the bacon and then diced it up so I didn’t have to touch raw meat….)

–         1 cup fresh basil leaves (go plant some more in the garden right now… I’ll wait…)

–         4-5 Tablespoons olive oil

–         ¼ cup dry roasted almonds

–         1 Tablespoon lemon juice

–         Salt and pepper to taste


Instructions:


–         Preheat oven to 425 degrees

–         Poke holes in all your sweet potatoes with a fork.  I then wrapped them in aluminum foil and put them on an aluminum foil covered baking sheet – have you ever tried to clean baked sweet potatoes off of your pan?  It is awful.  Bake then for 25 to 35 minutes or until they are done – nice and soft in the middle.

–         While they are baking, sauté your bacon in a pan until nice and crispy.

–         In a food processor, mix your almonds and basil, and then slowly add your olive oil till you get a nice pesto consistency.  Turn off your processor and add the lemon juice and salt and pepper to taste.

–         When the bacon is finished, crumble it up and add to the pesto.  The original recipe has you doing this in the pan with the bacon grease, but I skipped that bit and just mixed it all together in a clean bowl.

–         When your sweet potatoes have finished cooking, cut them in halves and carefully scoop out the middle bits – make sure and leave a good edge of sweet potato around the sides of each one.

–         Mix the scooped out sweet potato with the pesto/bacon until nice and smooth.  Spoon this back into your sweet potato boats.

–         Wrap them up to freeze now, or bake them for 8 to 10 more minutes until the top is a bit brown.

–         Enjoy!


Long-Cooked Broccoli

I love broccoli.  I could eat it every day, and sometimes I do.  I like it raw, steamed plain, steamed with salt, olive oil, and cumin (try it!), steamed with olive oil and baharat seasoning, and most other ways.  I add it to stews, sauces, chili, pizza, and curries.  If I am dining out on Thai food, I feel cheated if I don’t get broccoli in my dish (or even worse, just get that one lonely stalk!).

So this recipe from the Crankin’ Kitchen has been calling my name.

Long Cooked Broccoli

It is more a cooking technique than a recipe.  It is, well, long-cooked broccoli.  In water or broth, with a base of garlic and red pepper flakes sauteed in olive oil.  By long-cooked, the author means the cooking time is up to 2 hours.

It’s Saturday morning, and I’m relaxing at home and happen to have a head of broccoli (imagine that), so I tried this.

I know I usually include a “before” photo, but, gentle reader, I assume you know what a head of broccoli looks like.

It is an easy technique.  It was easy for me to get other cooking chores done while basically ignoring it.  And it was tasty.  I didn’t like it as much as the author, who claims to be able to eat three heads of long-cooked broccoli, but I liked it, and I’ll make it again.  Here it is with Mark Sisson’s meatloaf and a side of spaghetti squash:

By the way, the Crankin’ Kitchen blog is what a recipe blog *should* look like!  You should check it out.


Asian Broccoli Slaw

Asian Broccoli Slaw

Image Susan again and this time I have disappointing news…  The Asian Broccoli Slaw was not fabulous.  It wasn’t horrible, but I’m sure not going to find myself one day thinking ‘Man, what would really hit the spot right now is some more of that Asian Broccoli Slaw!’  Just not going to happen. Thankfully, you have us to test these recipes for you!  Aren’t you lucky!

What I liked:  It is beautiful.  It really is.  The colors are amazing.

What I did not like:  The taste was boring.  Even with the red pepper flakes and minced ginger.  Maybe it would be better if you doubled the dressing recipe?  I would give that a try if I make this again.

Here is the recipe.  I found it at http://www.multiplydelicious.com/thefood/2011/12/asian-broccoli-slaw/

Ingredients for the Slaw:

 Image

–         ½ Head Red Cabbage (finely sliced)

–         4 Cups Broccoli (grated in the food processor)

–         2 Green Onions

 Ingredients for the Sesame Ginger Dressing:


–         ½ Tablespoon garlic, minced

–         ½ Tablespoon ginger, minced

–         2 Tablespoons  Toasted Sesame Oil

–         2 Tablespoons Coconut Aminos

–         2 teaspoons Sesame Seeds

–         ½ teaspoon Sea Salt

–         ½ teaspoon Fresh Ground Black Pepper

–         ¼ to ½ teaspoon Red Pepper Flakes